Working on software development, website development and building apps has shaped our workflow over the last decade. We've adopted and adapted a number of processes that make development more effective and efficient – ultimately reducing risk.
Website Design and Website Development have similar but distinctly different process. This article looks at the Website Development process, please see this article for information about the Website Design Process.
Development process
We start with pen and paper. We (including your team) mind map the entire project and we’ll ask you lots of challenging questions.
Once we understand the business processes, workflows, user requirements, etc. we start with a flowchart of the business processes.
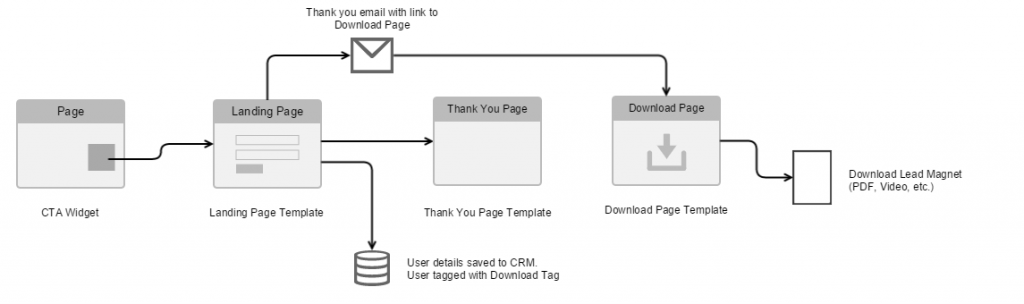 Example of a business process
Once we agree on the business processes we we build a sitemap and a clickable mock-up. This sitemap ensures we can map the entire user experience screen by screen.
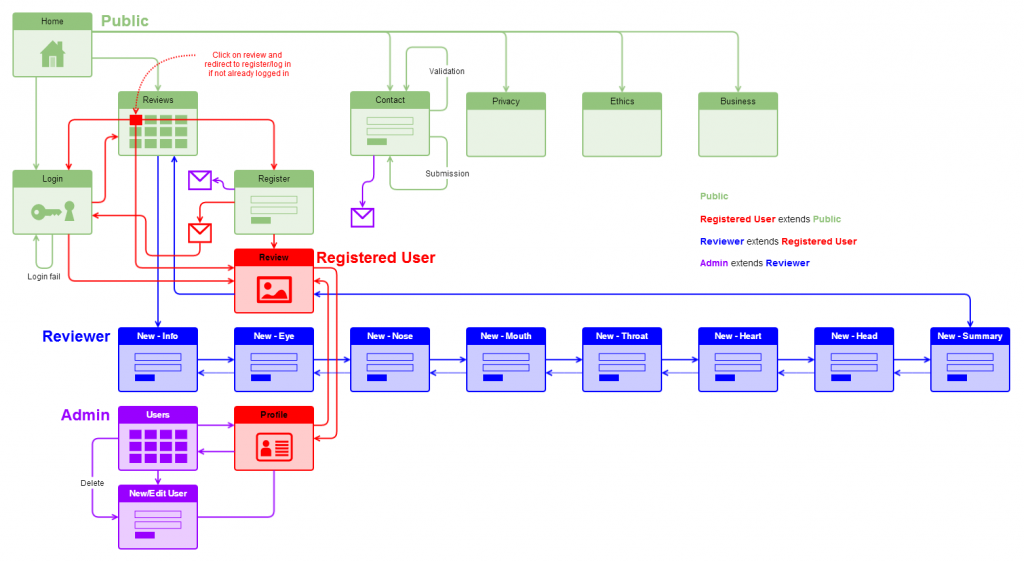 Example of a sitemap with colour coded user types
By building a clickable mockup it means we can resolve the User Experience before we’ve written a line of code (making development much more cost effective).
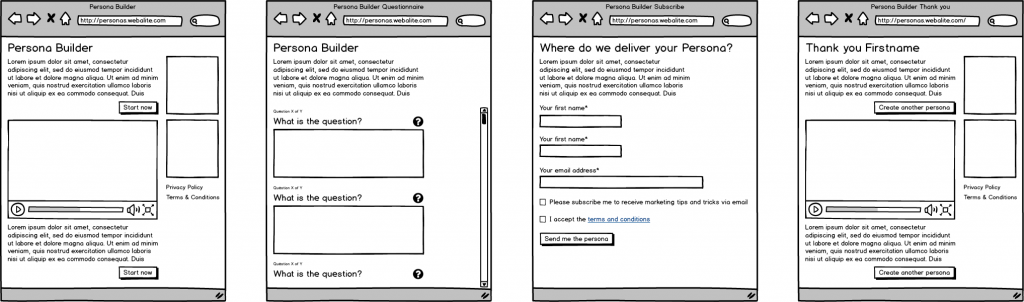 Example of a workflow in clickable mockups
The next step is to break the project into tasks, estimate and assign them to sprints (a group of tasks over a short period of time, see below).
The graphic design is then introduced as the site is developed.
Agile Project Management
The Agile development process means we work on specific pieces of functionality until completed, then release that functionality for testing and then into production. This means if we have 8 main feature sets each feature set will be ready for launch as available (as opposed to the Waterfall model where the project can’t be launched until everything is complete).
This means we can launch a Minimum Viable Product (MVP) and know that we have several more exciting features in the pipeline. The other benefit of this functionality is that we can schedule releases, and new features as we have cashflow available.
Again this contrasts with Waterfall technique where you have to build, and pay for, everything before launch.
User stories
As part of the scoping, architecture and planning project we will document all of the business requirements.
All requirements are broken down into components, "User Stories" and sub-tasks. A component could be "User Management". A "User Story" could be "A user can log in". A sub-task could be "to create a login form".
The sub-tasks are estimated, by the team, using a Fibonacci number system (1,2,3,5,8,13...) which assumes the larger the task the more variance there will be. For example if a developer estimates a task is going to take about 4 hours, the team decides if it should be 3 or 5 hours, or more.
The tasks are scheduled into a Sprint (in Agile terminology) which is a number of tasks achievable within the timeframe. Each Sprint is between 2 and 4 weeks apart. This means for every Sprint we deliver fully functioning code for the specific component. For example - the "user management" would allow the user to login and perform all functions assigned to that Sprint. All links to other components, in another Sprint, will work once that Sprint is completed.
Task Management in Jira
Geeks use geeky tools to manage the project. A few clients like to log in to see what we’re up to – it’s entirely transparent – some clients prefer reports with a high level picture. It’s up to you.
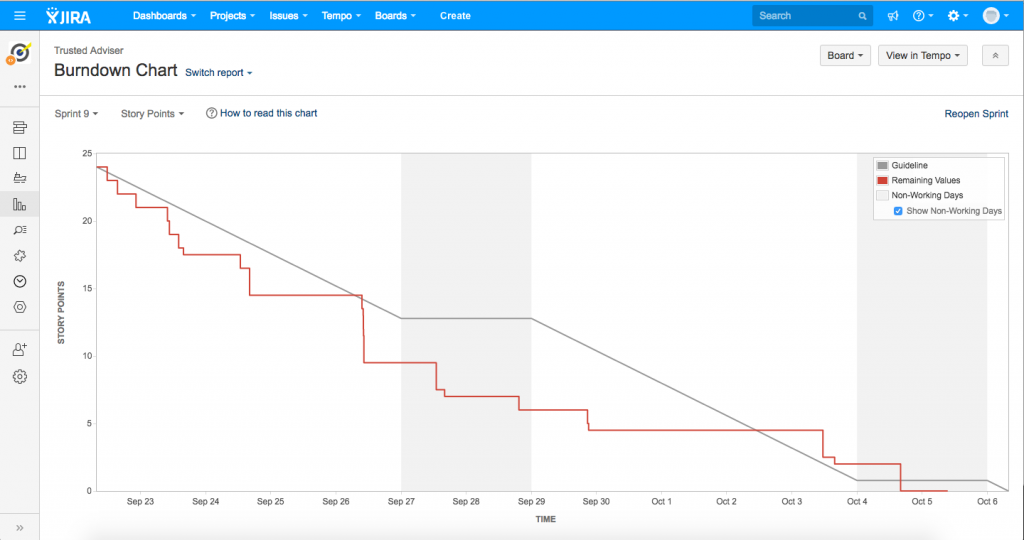 This Burndown Chart shows progress (red line) against the target (grey line) in this case we were ahead of schedule, then got stuck on one issue (where the red line “flat lines”)
In Jira we log work on every task so we can see how long our tasks took compared to our estimates. Every Sprint shows us a Burndown Chart so we know - in real time - how we are progressing.
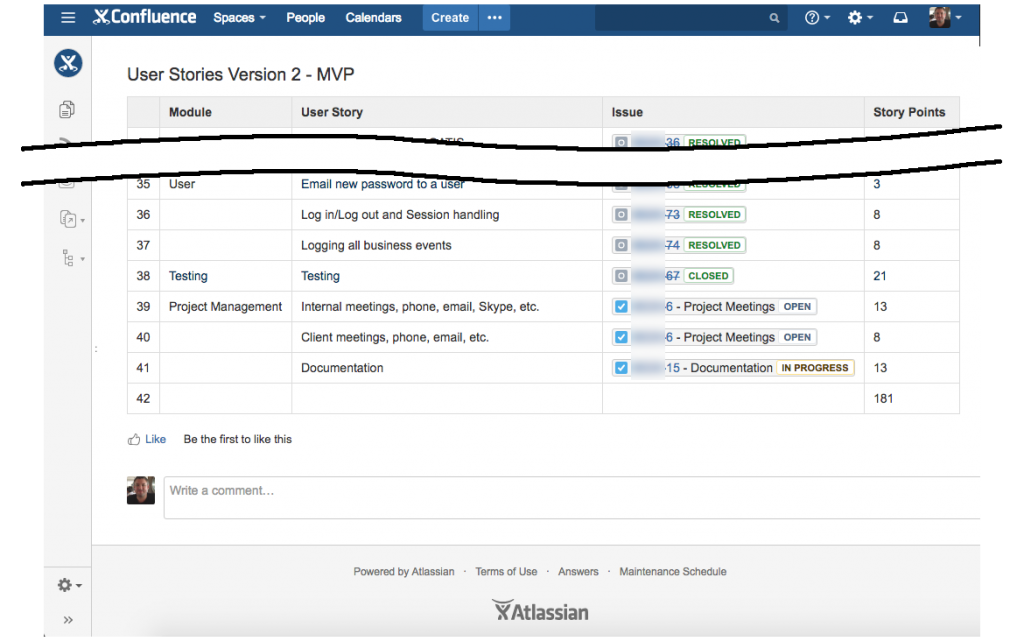
Documentation in Confluence
The entire project is documented in a ”wiki” which is basically a living document where all information is captured so we can quickly and easily communicate without having to wade through email chains. All process, workflows, sitemaps, mockups and notes are stored – as they’re created – so there is one definitive information source.
Development Workflow
The code is developed and tested on different systems to reduce the number of bugs in production and make it easier for a team to work together.
Local > Development > Staging > Production
During the development process the code is written and tested locally before being moved to a development server. Once it’s on the development server we can test it to refine the code and fix any bugs. Once the code is working it’s pushed to the Staging Server where you can log in to see the changes. This is a second opportunity to check the functionality and eliminate any bugs. Once approved the changes are push to Production.
Version Control
We use a Software Version Control system (called Git) so we can manage the development process from different developers and servers. This allows us to monitor the development process and quickly identify any issues. Our Version Control System is tightly linked to our Job Management System so we can see exactly what happened, and when, if there is an issue making it much faster and easier to resolve.
.png?width=352&name=app.hubspot.com_workflows_2662745_platform_flow_340373627_edit(1440%20x%20900).png)